Showing posts with label Apps. Show all posts

Friday, 5 August 2011

Tetris clone on Android: Day 2

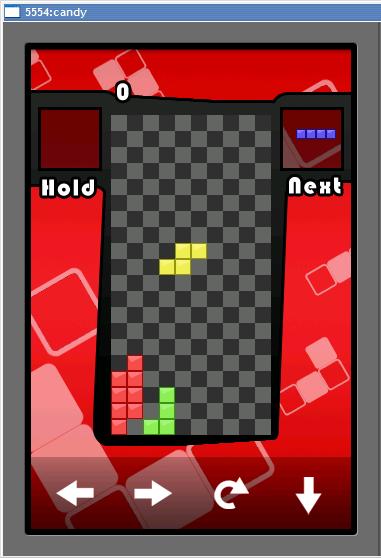
Hi guys! I've been working on the design of my Tetris clone game and some minor adjustments like adding hold and drop function. The design is a bit rough. I even forgot to have my power nap :D. I was having fun doing this. I would also like to share to you about vibrations on Android. It would be nice if the user can feel they clicked on something by adding a what they call "Haptic Feedback". So I added a vibrate function and add it in my game engine.


This is how to initialize a Vibration on Android:

Vibrator vibrator =(Vibrator)getSystemService(Context.VIBRATOR_SERVICE);

To make your Android device vibrate, you need to call the vibrate() method with a parameter of type float which is the time needed for it to vibrate.

vibrator.vibrate(50);


I still need to refine the input system cause it seems a little bit off when using.

Thursday, 4 August 2011

My Tetris clone on Android

Hi guys! Today, I'm back to developing Android applications and my first step is making a tetris clone. I based it  on my XNA implementation of tetris a year ago. The code that I followed is made by Javier Lopez's tutorial on making a tetris clone in C++ (Credits to him I learned a lot when I was still studying :D). He has a very good and clean code (Clean enough for C++ implementation) which made it easy to implement on various platforms including Android (Windows, XBOX, iPhone, name it!). I've gone through many tutorials on making a Tetris clone but this ones the best I could see (I bought a book before about game development which has a chapter focusing on developing a tetris clone, It sucks! It's so language specific and complex).

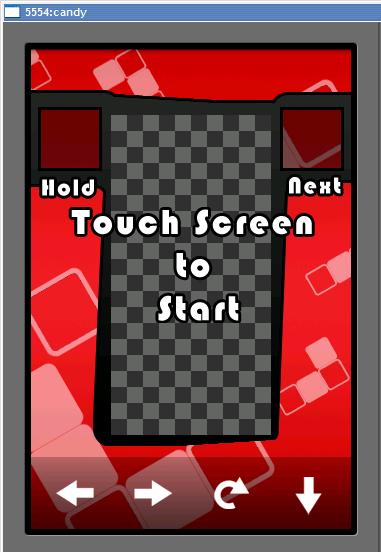
My Tetris clone in a Emulator
I based my work on my dirty game engine. I'm still continuing to develop this app and I will base my future game (Similar yet very different to tetris) on this. I'm glad to be back on developing Android applications! :D

Thursday, 28 July 2011

Chikka for Android

Chikka: STILL the best way to send FREE TEXT MESSAGES to the philippines.

What's with the big "STILL"? because it is now available on your Android Device! :D Imagine all you can text with this app. Chikka has made a lot of improvements on their services: like their desktop version, facebook app, iPhone, and Android. There are many ways to send text messages on the web, but Chikka is proven and tested. Used by a lot of Filipinos to send free text messages via the internet. Users can chat or send text messages to everyone using the internet. That's good news to everyone. So why waste your cellphone load if there is a way to send free text messages?

Too good to be true? well, not much. There are some flaws to this app (Though I don't get these flaws usually). Some say that they cannot receive the messages (sometimes late) while others cannot view their buddy list. But all these does not keep you from sending free text messages so no worries.

For new users, all you need is to register in Chikka. It's easy to register, you only need to provide your mobile number and your email address. Now, you can send free text messages without wasting your cellphone load, even when you're abroad! (outside the Philippines of course :D)

Download this app in the market here.

Wednesday, 27 July 2011

Mango: Manga Readers, Rejoice!


Are you also a Manga Fanatic like me? Been reading Naruto, Bleach, and One Piece lately? Do you want reading manga not on your browser? Now here it is: Mango - a manga reader with slick design, fast download, over 8,000 titles and updating, and other features like offline reading, bookmarking, and the best part, its free!


Mango is a free manga reader app on Android (they also have blackberry). This app is the best manga reader available on Android. You could search for your favorite manga title. Read it with ease with its pinch to zoom function, gesture controls, jump-to-page, and a lot more! I don't even experience a bit of sluggishness (unlike Adobe Reader) because it's real fast! Every manga reader should have this app.

More of the talking: Download this app here.

You'll love it more when you try it.

Wednesday, 20 July 2011

Game Dev Story: Addicting and Fun


Lately on my Android life, I found a game that interests me (somehow, hehehe) on the Android Market with the title Game Dev Story. At first, I thought this game is somewhat technical (particularly in making games, which is also my interest), so I downloaded its "Lite" version to test it out. Graphics are somewhat like the games you see on GameBoy with a button telling me to play this game (actually it is labeled as "new game", hehehe). I was then brought to a world identical to ours but me as a president of "Sunny Studios". I found my Secretary welcomes me and tells me to hire new employees. Your ultimate goal, as the president of your company, is to be on top of the video game industry.

Now lets get back to the real life. Your Secretary in the game tells you hints while your still familiarizing the game. You have about 2 employees (that are doing nothing at the very beginning). You can add your employees by hiring. You can do many things to your employees like training them (training boosts their stats, making them more productive in making games), level them up (same as training but their salaries increased, ouch), change their careers (change their job description when they are at maximum level, which is Lvl 5, and rotate their jobs until you get an option making him/her a Hardware Engineer), give them items that boosts their stats, and fire them (ouch).


You make your company productive by doing jobs outside (contracts) and making games (new game). Contracts gives you small but fast cash (you need to finish the job of course). Making games, like real life, is expensive. You need to purchase licenses to develop for a console (BTW, there are many consoles in the game), choosing a genre and a type of game also has a price, even the development process (direction of the game).

To much of the expenses, lets go through the return of your investments. Actually, the money you make by making a game depends on your game. So you need to make sure you have the right combinations of genre and type (there are many in the internet you can find), employees with good stats, good timing (which is usually december), and the right console. Not all consoles in the game gives you a lot of money (The game consoles in Game Dev Story are real life consoles, with different names and design of course. Choose the ones that look like a Game Boy and a Play Station). To ensure you have many sales, you must advertise your game to make many fans. The more fans you have, the more sales you get.

I wasn't able to continue my quest as a president of "Sunny Studios" because I just downloaded the lite version. Even so, It was addicting and fun! I love the game. Even my girlfriend is enjoying this game. The technicality of making a game was simplified by a game making it more fun and enjoyable. As a game developer, I learned a lot from this game.

I want you to try it out. You can download the game in the Android Market:

The game is also available on iPhone.

Monday, 18 July 2011

Multi-Touch on Android

Have you ever heard the word "pinch", "gestures", and "touch" (Yeah, the first word is doing something like this... OUCH!!!!!)? These terms are usually related to touch events on handsets (iPhone, Android, etc.).


Touch Events are events that happens when you press, release, move, or any movement you do with the screen (Touching the screen is not limited to your fingers, as long as pressure is applied to any part of the screen). Implementing touch events on android is very simple. All you have to do is implement the OnTouchListener interface, register the implemented class to a certain view you want touch events to be handled (e.g. TextView), override the onTouch() method, and get some useful values of the MotionEvent parameter of the method (The useful ones are MotionEvent.getX(), MotionEvent.getY(), and MotionEvent.getAction()).

Multi-touching, on the other hand, is a bit to complicated (Though its a bit similar to the simple single touch event like implementing the OnTouchListener, register it to a view, so on and so forth :D). The only difference is getting the values of each screen gesture (1 finger pressing, another for moving).

Getting each touch event's position can be achieved by MotionEvent.getX(), but you must supply it with a argument of type int. This argument is so called pointer index. Sounds easy? No! You might be thinking that the pointer index is just the index of the touch event (0 for the first, 1 for the second, etc. ), which is not the case. This pointer index of ours is an index into internal arrays of the Motion Event that hold the coordinates of a specific event (or gesture). The real index of our specific touch event is the so called pointer identifier or pointer id. To get the pointer id, we will use the method MotionEvent.getPointerIdentifier() with the pointer index as our argument. This 2 terms must not be misunderstood as similar (maybe because of their spelling, probably :D). Just remember, [finger = pointer id. not pointer idx]. Now were starting to get on fire! Yeah!!!

So how to get the pointer index if it is not the number of the finger I used? Hope you have practiced your bit masking tricks. To get the pointer index, you need to mask the MotionEvent.getAction() and MotionEvent.ACTION_POINTER_ID_MASK then shift the result with MotionEvent.ACTION_POINTER_ID_SHIFT.

int pointerIndex = (MotionEvent.getAction() & MotionEvent.ACTION_POINTER_ID_MASK) >> MotionEvent.ACTION_POINTER_ID_SHIFT;

Next step is to get the event's action. To get the action of the event, all we need to do is mask the MotionEvent.getAction() and MotionEvent.ACTION_MASK.

int action = MotionEvent.getAction() & MotionEvent.ACTION_MASK;

With single touch events on Android, we only (or commonly) tackle MotionEvent.ACTION_DOWN, MotionEvent.ACTION_MOVE, and MotionEvent.ACTION_UP. With multi-touch events, we will still use the same constants, but with 2 more constants. These are MotionEvent.ACTION_POINTER_DOWN and MotionEvent.ACTION_POINTER_UP.

MotionEvent.ACTION_POINTER_DOWN event is similar to MotionEvent.ACTION_DOWN event. The only difference is that MotionEvent.ACTION_POINTER_DOWN happens when there are more than 1 touch event is fired (The first touch event produces a MotionEvent.ACTION_DOWN action).

The same is to MotionEvent.ACTION_POINTER_UP and MotionEvent.ACTION_UP. The last touch event produces a MotionEvent.ACTION_UP and the rest are MotionEvent.ACTION_POINTER_UP. Note that the event that produces a MotionEvent.ACTION_UP action does not necessarily mean it is the same event that produces the MotionEvent.ACTION_DOWN action.

To get the number of touch events (or fingers), you will use the MotionEvent.getPointerCount().

The code below is a sample application that implements multi-touch support.


public class MultiTouchTest 
extends Activity 
implements OnTouchListener
{
StringBuilder builder = new StringBuilder();
TextView textView;
float[] x = new float[10];
float[] y = new float[10];
boolean[] touched = new boolean[10];

private void updateTextView()
{
builder.setLength(0);
for(int i = 0; i < 10; i++)
{
builder.append(touched[i]);
builder.append(", ");
builder.append(x[i]);
builder.append(", ");
builder.append(y[i]);
builder.append('\n');
}
textView.setText(builder.toString());
}

@Override
protected void onCreate(Bundle savedInstanceState) {
// TODO Auto-generated method stub
super.onCreate(savedInstanceState);
textView = new TextView(this);
textView.setText("Touch and drag, multiple fingers supported");
textView.setOnTouchListener(this);
setContentView(textView);
}


@Override
public boolean onTouch(View view, MotionEvent event) {
int action = event.getAction() & MotionEvent.ACTION_MASK;
int pointerIndex = (event.getAction() & MotionEvent.ACTION_POINTER_ID_MASK) >> MotionEvent.ACTION_POINTER_ID_SHIFT;
int pointerId = event.getPointerId(pointerIndex);

switch(action)
{
case MotionEvent.ACTION_DOWN:
case MotionEvent.ACTION_POINTER_DOWN:
touched[pointerId] = true;
x[pointerId] = (int)event.getX(pointerIndex);
y[pointerId] = (int)event.getY(pointerIndex);
break;
case MotionEvent.ACTION_UP:
case MotionEvent.ACTION_POINTER_UP:
case MotionEvent.ACTION_CANCEL:
touched[pointerId] = false;
x[pointerId] = (int)event.getX(pointerIndex);
y[pointerId] = (int)event.getY(pointerIndex);
break;
case MotionEvent.ACTION_MOVE:
int pointerCount = event.getPointerCount();
for(int i = 0; i < pointerCount; i++)
{
pointerIndex = i;
pointerId = event.getPointerId(pointerIndex);
x[pointerId] = (int)event.getX(pointerIndex);
y[pointerId] = (int)event.getY(pointerIndex);
}
break;
}

updateTextView();
return true;
}


}


You can download the file here.

Getting the distance between 2 points using pythagorean theorem.
What about pinching? You can implement pinching by getting the distance between 2 points. Use the distance to process pinching, like zooming by this value.


Happy coding! :D

Saturday, 16 July 2011

Accelerometer Explained!

Accelerometers brings more usability to Android devices. Your phone can be a pedometer, it can detect the acceleration of your car, and even playing your phone like Wii. Technically, an accelerometer is a device that reports the acceleration exerted by the gravity of our planet on a specific axes. Most Android phones have a three-axis accelerometer making our handsets more interesting. The acceleration is expressed in meters per second. When an axis points away from the center of the Earth, the maximum acceleration is applied to it. If an axis points toward the center of the Earth, we get a negative maximum acceleration. For example, if we hold our phone in portrait mode (image you hold it very straight and you dont have a shaky hands), the accelerometer will report an acceleration of 9.8 m/s (this is because of the gravity of the earth. Free falling objects will have an acceleration of 9.8 m/s towards) while the rest of its axes are 0 m/s.

Android Phone with imaginary arrows representing the X and Y axis. Z axis' direction is in front of your phone.
To better understand this explanation, lets create an application that displays the values of our accelerometer.

First thing to do is to register a listener. The name of the listener is SensorEventListener. It has 2 methods to implement, onSensorChanged() and onAccuracyChanged(). onSensorChanged() is called whenever a new accelerometer event happens. The onAccuracyChanged() is called when the accuracy of our sensor changes.


public class AccelerometerTest 
extends Activity 
implements SensorEventListener
{
@Override
public void onAccuracyChanged(Sensor sensor, int accuracy) {

}


@Override
public void onSensorChanged(SensorEvent event) {

}
}


To register our listener, we need to check whether an accelerometer is installed on our Android device. We will be using a SensorManager class, which we will use to check for an accelerometer and register the listener to it. Here's the code to do all does things (place this code in your onCreate() method):


SensorManager manager = (SensorManager)getSystemService(Context.SENSOR_SERVICE);
if(manager.getSensorList(Sensor.TYPE_ACCELEROMETER).size() == 0)
{
//no accelerometer installed
}
else
{
Sensor sensor = manager.getSensorList(Sensor.TYPE_ACCELEROMETER).get(0);
if(manager.registerListener(this, sensor, SensorManager.SENSOR_DELAY_GAME))
{
//cannot register sensor listener
}
}


Your accelerometer is now ready. We will then display the values of our device's accelerometer. The SensorEvent parameter of our onSensorChanged() method has a field member named values which is an array. SensorEvent.values[0] returns the value of X axis, SensorEvent.values[1] returns the value of Y axis, and SensorEvent.values[2] returns the value of Z axis. Try holding your phone in portrait and you will get a positive number in the Y axis. For the X axis, try holding your phone in landscape, its right side facing to the sky. Also try facing your phone's screen to the sky to get a positive number in the Z axis.

The full source code of this post is found here.

Friday, 15 July 2011

Rooting Android

Hey! look at my rooted phone, it's so cool!

I am using my phone to study Linux


Rooting? What the hell is that by the way?

Rooting your Android phone is the process of attaining a "root" access (Linux account that, by default, has all access to all commands and files on its system) within Android's Linux subsystem. You may not have noticed it, but manufacturers of your phone limits you from some of its capabilities (including the hardcore ones :D). Your phone might be able to support multi-touching capabilities, sharing your mobile data connection via USB or Bluetooth, or even make your phone a WIFI hotspot. Cool isn't it? There are even more capabilities to be discovered from your phone by rooting your Android device. Here are some things you can do with a rooted device:

  • Custom ROMS
  • Fancy Themes and UI
  • Performance Boosts
  • Unlock unavailable features
  • Hardware tweaks, overclocks, etc.
  • Root-only apps
  • and many more!
Cool. Totally cool dude!

Hey! Were not done yet. There's a catch when you try rooting your Android device. If you overdo things, like overclocking to the highest level, you might brick your phone. It will be rendered useless. No wonder why manufacturers limit our phone's capabilities :D. So be responsible when you are already in root.

So how do we root Android-powered devices? 
There are many ways, actually. Some of them are specific to a device. But there are apps that make your phone go root. Just a click or 2, your phone can now go ninja :D.

I use Universal Androot which can be found here. There are others like Z4Root. Place the .apk file in your sdcard then click it to run the installer. Make sure that you enable installing non-market applications which can be found in Settings > Applications > Unknown sources. Then run Universal Androot or Z4Root. You will see a button that will make your device root-enabled. Click it and you will rule your device! (Check Universal Androot to see what I'm talking :D)

This is the UI of Universal Androot

Cool design of Z4Root

Congratulations! Your phone is now rooted. Go to the Android Market for root-only applications and equip your device with powerful tools.

Thursday, 14 July 2011

Quick and Dirty Android Game Engine

Hi guys! This is my first post of my first blog! :D And it will be about making a quick and dirty game framework from scratch. It took me months to research about android and making games on it (There were very few tutorials for game development on android and there are fewer game engines available for it). You can download the file that we will be making here.

Let's start by creating a new android project. Supply the following information when prompted on creating a new android project:

  • Project Name: Dirty Game
  • Build Target: Android 3.1
  • Application Name: Dirty Game
  • Package Name: ind.crys.dirtyframework (or any package name of you choice)
  • Create Activity: DirtyActivity
  • Min SDK Version: 3

Eclipse will now display a ready to use activity naming DirtyActivity. Lets start by implementing an OnTouchListener and override the onTouch() method.

public class DirtyActivity 
extends Activity 
implements OnTouchListener
{

@Override
    public void onCreate(Bundle savedInstanceState) {
        super.onCreate(savedInstanceState);
        setContentView(R.layout.main);
    }

@Override
public boolean onTouch(View view, MotionEvent event) 
{
}
}


Next stop, we will need to make a way to hold some important values every time the players of our game will touch the screen and use those values on our game loop for further processing. We will be making a class inside the dirty activity naming "TouchEvent" with fields naming x, y, and eventType all with a type of int. The x and y fields are the X and Y coordinates of the touch event. The eventType is the type of action made by the user in the screen. We will then add 3 integer constants in this class naming TOUCH_DOWN, TOUCH_MOVE, and TOUCH_UP with values 0, 1, 2 respectively. This constants will be used in assigning the value of the eventType field (we cant use the MotionEvent.ACTION_XX constants because there are many of them, some can be confused with the other. Keeping things simple :D).

class TouchEvent{
int x;
int y;
int eventType;
public static final int TOUCH_DOWN = 0;
public static final int TOUCH_MOVE = 1;
public static final int TOUCH_UP = 2;
/**
* @return the x
*/
public int getX() {
return x;
}
/**
* @param x the x to set
*/
public void setX(int x) {
this.x = x;
}
/**
* @return the y
*/
public int getY() {
return y;
}
/**
* @param y the y to set
*/
public void setY(int y) {
this.y = y;
}
/**
* @return the eventType
*/
public int getEventType() {
return eventType;
}
/**
* @param eventType the eventType to set
*/
public void setEventType(int eventType) {
this.eventType = eventType;
}
public TouchEvent() {
this.x = 0;
this.y = 0;
this.eventType = TOUCH_DOWN;
}

public TouchEvent(int x, int y, int eventType) {
this.x = x;
this.y = y;
this.eventType = eventType;
}
}

We will add a field in our DirtyActivity class naming "lastTouchEvent" with the type TouchEvent. We will use this to get the touch input values and use it in our game loop. There are many other techniques on getting touch events (one of which is called Pooling) but lets keep this game engine simple. Every time the players of our game does something to the screen (touching it, swiping it, drooling on it) we will save the values of that event on the lastTouchEvent variable. Add to fields in our DirtyActivity naming scaleX and scaleY with the type float. We use this later on (particular to drawing things in the screen). Copy the line of code below replacing the old onTouch() method that we had last:

public boolean onTouch(View view, MotionEvent event) {
lastTouchEvent = new TouchEvent();
switch(event.getAction())
{
case MotionEvent.ACTION_DOWN:
lastTouchEvent.setEventType(TouchEvent.TOUCH_DOWN);
break;
case MotionEvent.ACTION_MOVE:
lastTouchEvent.setEventType(TouchEvent.TOUCH_MOVE);
break;
case MotionEvent.ACTION_CANCEL:
case MotionEvent.ACTION_UP:
lastTouchEvent.setEventType(TouchEvent.TOUCH_UP);
break;
}


int newX = (int)(event.getX() * scaleX);
int newY = (int)(event.getY() * scaleY);
newX = (newX == 0) ? (int)event.getX() : newX;
newY = (newY == 0) ? (int)event.getY() : newY;
lastTouchEvent.setX(newX);
lastTouchEvent.setY(newY);
return true;
}

The code above simply creates a new TouchEvent object and assign it to the lastTouchEvent variable. As you may have noticed, we assigned the X and Y coordinates of our touch event multiplied by scaleX/scaleY variable. It is because we will be drawing on a fixed sized canvas and because not all handsets (or even tablets) have the same screen size. We will then scale our canvas with the size of the handset. The scaleX and scaleY fields are the ratio of the handset's screen size and our canvas' size. By the time users touches the screen, the X and Y coordinates of the touch event will be in the exact position as that of the canvas, not the handsets screen. Later on, we will assign the scaleX/scaleY fields. 

Next thing to do is to create a way to draw things in the screen. We will be extending the SurfaceView class and use it for drawing graphics (By the way, SurfaceView is a special view that we can use to make it draw on another thread). We will name this class as FastRenderView and it will inherit SurfaceView and implements Runnable interface. Copy the code below:

class FastRenderView
extends SurfaceView
implements Runnable{
Thread renderThread;
SurfaceHolder holder;
volatile boolean isRunning = false;
public FastRenderView(Context context) {
super(context);
holder = this.getHolder();
}
//Methods
public void resume(){
isRunning = true;
renderThread = new Thread(this);
renderThread.start();
}
public void pause(){
isRunning = false;
while(true){
try{
renderThread.join();
break;
}
catch(InterruptedException e){
}
}
}
//Event
@Override
public void run() {
Rect dstRect = new Rect();
long startTime = System.nanoTime();
while(isRunning){
if(!holder.getSurface().isValid())
continue;
float deltaTime = (System.nanoTime() - startTime) / 1000000000.0f;
startTime = System.nanoTime();
DirtyActivity.this.update(deltaTime);
DirtyActivity.this.draw(deltaTime);
Canvas canvas = holder.lockCanvas();
canvas.getClipBounds(dstRect);
canvas.drawBitmap(DirtyActivity.this.frameBuffer, null, dstRect, null);
holder.unlockCanvasAndPost(canvas);
}
}
}

We will use FastRenderView class as our game loop. On the run() method of this class, you will find that it calls 2 methods of our DirtyActivity naming update() and draw() both of which accepts a float value representing the delta time. We will be using these methods to update game logic and to draw objects in our game. The FastRenderView class also uses a Bitmap that is found in our DirtyActivity naming frameBuffer. The frameBuffer field will be our fixed sized canvas. The 2 methods of our FastRenderView class, naming pause and resume, are used when our activity is paused or resumed (pretty self explanatory isn't it?). 

Were almost there! Copy the code before and place it in our DirtyActivity class:

// Fields
FastRenderView view;
TouchEvent lastTouchEvent;
Bitmap frameBuffer;
Canvas graphics;
Paint centralPainter;
float scaleX;
float scaleY;
WakeLock wakeLock;

public static int PREFFERED_WIDTH = 320;
public static int PREFFERED_HEIGHT = 480;

//Methods

public void initialize(){
}

public void update(float deltaTime){
lastTouchEvent = null;
}

public void draw(float deltaTime){
}

/**
 * @return the lastTouchEvent
 */
public TouchEvent getLastTouchEvent() {
return lastTouchEvent;
}

/**
 * @return the graphics
 */
public Canvas getGraphics() {
return graphics;
}

/**
 * @return the centralPainter
 */
public Paint getCentralPainter() {
return centralPainter;
}

The view field is the instance of our FastRenderView that we will use. The frameBuffer field is our fixed sized canvas that we used to draw in our FastRenderView. The graphics field is the instance of our Canvas class that we will use to draw things in our game loop. The centralPainter field is an instance of Paint class that we will use on our graphics field (I guess 1 Paint class is enough, but you can make more instances of Paint class if you want to :D). We then declared a field named wakeLock with a type of WakeLock. We will use this for the heck of not turning off the lights of our screens while our users play our games. The methods below are getters that will be used to on our game engine (We will use getLastTouchEvent() to get the touch event values and use it in our update() method to further process. getGraphics() and getCentralPainter() methods will be used in our draw() method). PREFFERED_WIDTH and PREFFERED_HEIGHT is the width and height of our frameBuffer. Our game will be drawn out of these dimensions, scaled to the screen of our player's handsets. So if your game idea needs it to be in portrait orientation, change their values. Or if your game needs to be with 1024X768 screen dimensions (Wow!), change their values. We can change this the way you want your canvas will be drawn.

Copy the code below to finalize everything.

@Override
public void onCreate(Bundle savedInstanceState) {
super.onCreate(savedInstanceState);
PowerManager powerManager = (PowerManager)getSystemService(Context.POWER_SERVICE);
wakeLock = powerManager.newWakeLock(PowerManager.FULL_WAKE_LOCK, "wakelock");
requestWindowFeature(Window.FEATURE_NO_TITLE);
getWindow().setFlags(WindowManager.LayoutParams.FLAG_FULLSCREEN, WindowManager.LayoutParams.FLAG_FULLSCREEN);
frameBuffer = Bitmap.createBitmap(PREFFERED_WIDTH, PREFFERED_HEIGHT, Config.RGB_565);
graphics = new Canvas(frameBuffer);
centralPainter = new Paint();
view = new FastRenderView(this);
view.setOnTouchListener(this);
scaleX = getWindowManager().getDefaultDisplay().getWidth() / PREFFERED_WIDTH;
scaleY = getWindowManager().getDefaultDisplay().getHeight() / PREFFERED_HEIGHT;
setContentView(view);
initialize();
}

@Override
protected void onPause() {
wakeLock.release();
view.pause();
super.onPause();
}

@Override
protected void onResume() {
wakeLock.acquire();
view.resume();
super.onResume();
}

Most things here are android specific. PowerManager provides us the instance of our wakeLock field. Then we made our game full screen by calling requestWindowFeature() method and getWindow().setFlags() method. We then initialize our frameBuffer, graphics, and centralPainter fields. We then initialize our view field set our activity's view with this FastRenderView instance. 

Thats it! To finalize everything, create an activity that extends our DirtyActivity class and override initialize(), update(), and draw() methods. Set this activity as your main activity in your Manifest file. Also set the screen orientation as portrait (or landscape, as long as it corresponds to your PREFFERED_WIDTH/PREFFERED_HEIGHT. You should use fixed orientation to not to confuse the players of our game)

Lets try drawing something:

@Override
public void draw(float deltaTime) {
getGraphics().drawRGB(100, 149, 237);

super.draw(deltaTime);
}

This will color the screen to my favorite color "Cornflower blue" (this color is the default background color of games made in XNA, a game framework for PC and XBOX using the language C#). You can do more in drawing with canvas like drawing lines, shapes, images (perfect for games) and many more. Your imagination is the limit. You can get some info in the official android Canvas documentation.

Lets try processing input in our update() method:

@Override
public void update(float deltaTime) {
TouchEvent touchEvent = getLastTouchEvent();
if(touchEvent != null){
Log.i("Touch Event", touchEvent.toString());
}
super.update(deltaTime);
}

Everytime a touch event is made, LogCat will display the values of our TouchEvent. There's not much we can do in processing input because were limited with one TouchEvent and its not even supporting multi-touch functionality. Nevertheless, many games are still great with such limitations (Imagine all the games with point and click or point and drag input. Already imagined something?).

This game engine does not do much, unlike other free/commercial android game engines out there. But I believe that making a great game or app is not about what engine we use. Its all in our ideas as a developer. 

Happy coding! :D

Chitika