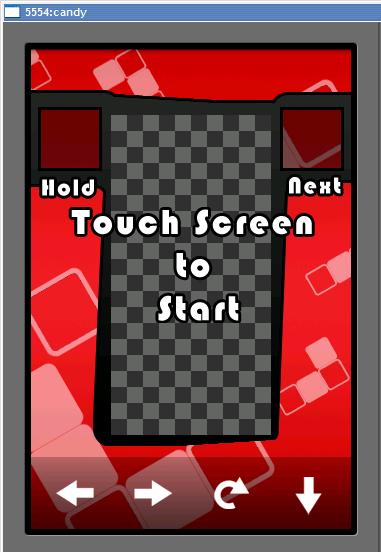
Hi guys! I've been working on the design of my Tetris clone game and some minor adjustments like adding hold and drop function. The design is a bit rough. I even forgot to have my power nap :D. I was having fun doing this. I would also like to share to you about vibrations on Android. It would be nice if the user can feel they clicked on something by adding a what they call "Haptic Feedback". So I added a vibrate function and add it in my game engine.
This is how to initialize a Vibration on Android:
Vibrator vibrator =(Vibrator)getSystemService(Context.VIBRATOR_SERVICE);
To make your Android device vibrate, you need to call the vibrate() method with a parameter of type float which is the time needed for it to vibrate.
vibrator.vibrate(50);
I still need to refine the input system cause it seems a little bit off when using.
Showing posts with label Games. Show all posts
Friday, 5 August 2011
Thursday, 4 August 2011
My Tetris clone on Android
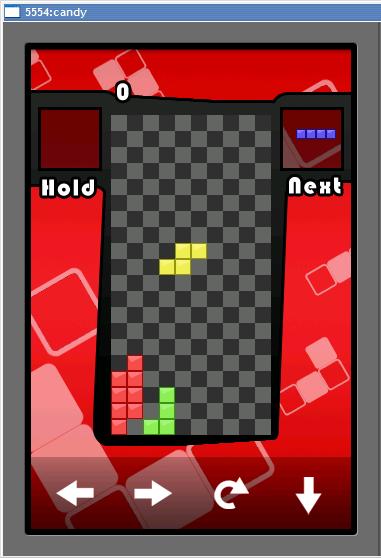
Hi guys! Today, I'm back to developing Android applications and my first step is making a tetris clone. I based it on my XNA implementation of tetris a year ago. The code that I followed is made by Javier Lopez's tutorial on making a tetris clone in C++ (Credits to him I learned a lot when I was still studying :D). He has a very good and clean code (Clean enough for C++ implementation) which made it easy to implement on various platforms including Android (Windows, XBOX, iPhone, name it!). I've gone through many tutorials on making a Tetris clone but this ones the best I could see (I bought a book before about game development which has a chapter focusing on developing a tetris clone, It sucks! It's so language specific and complex).
I based my work on my dirty game engine. I'm still continuing to develop this app and I will base my future game (Similar yet very different to tetris) on this. I'm glad to be back on developing Android applications! :D
| My Tetris clone in a Emulator |
Saturday, 30 July 2011
Make your Android device into a killer game console with "Inotia 3: Children of Carnia"
Few days ago, I was a bit busy working on a certain project and at the same time, I glued my eyes on a game I got interest to. This game was titled: "Inotia 3: Children of Carnia". I was a bit curious because I saw the pictures about it which has great graphics (comparable to a GameBoy Advance or sort) so I tested it out. It really have great graphics, very stunning indeed :D. The game was RPG (with all those hack and slash thingy). The story revolves around a boy named Lucio (the main character of the game) and his (probably) past life as Laciel (much like the hero in the game's world). In the game, you start out by preparing for Lucio's "Adulthood Ceremony", you do some chores for other people (like most RPG nowadays). Lucio's adventure started when he stumbled upon a dying orc which then gave him a gauntlets which happens to be powerful. The gauntlets led him to a series of adventures and perils, meeting friends and enemies that are also looking for it. Everything happened to him was fate after all, knowing that he was the chosen one (he disagrees this at the very beginning even if powerful spirits tell him he was).
In the game, you get to choose from different classes with different strengths and abilities. You get to fight along with other characters or hire mercenaries in the game which you could also use. Enjoy the game with hundreds of game maps, items and quests. The best part of the game is the graphics. I could actually compare this game with other games found in various consoles. Try using the Arch Mage class and feel the power with the intensity of the graphics hitting to enemies at its wake. I got my eyes glued on this game for straight 5 days.
My only problem with the game is that it constantly hangs up (Showing the game is indeed very heavy). I am forced to skip cut scenes and sounds to make it a bit playable but still it hangs up (I even tried to make the graphics option lower). To slower Android devices like mine, don't even bother playing at all, you'll get frustrated.
Download Inotia 3: Children of Carnia here.
Have fun!! :D
Friday, 22 July 2011
Fruit Ninja: Enter the clan
Feel like being in the "Ninja World" of Naruto? Is your hands as fast as the "Yellow Flash". Are you craving for fruits? Here's your chance to be a part of the Fruit Ninja Clan!
One of the best games I played on my Android phone is Fruit Ninja. An excellent action game wherein players slash fruits to score up. As what Sensei (The old man you always see on the game) says: Ninjas Hate Fruits. Its very addictive and challenging. It features worldwide leaderboards via OpenFeint, making you want to be on top of all Ninjas scattered across the world. It has 3 game plays: Classic for slashing fruits and evading bombs, Zen mode for time trialed action, and the new Arcade mode which features power ups. You can also unlock a number of swords and backgrounds that you will use in the game. This game is satisfyingly fun! You'll never take your eyes off of it.
Are you up for the action? Download the game on Android here. You can also view their website.
Angry Birds: Why I love them
Angry Birds
Everyone knows them. Everyone loves them. Everyone is a big fan of them. They have them on their smart phones, browsers, stuffed toys, wallpapers, bags, t-shirts, they are everywhere you can imagine! Angry Birds is like a virus spreading everywhere. This enjoyable physics game is so much fun. It has been a big hit since it was made. The game play is so addicting. I can't even take my eyes off it. The objectives is simple, destroy all pigs with those birds. You, as a player, are armed with a slingshot to throw those birds to were the greedy pigs are hiding. You can directly destroy them, or hit structures that will fall to them (That certainly hurts in real life too :D).
When I was a game development trainee back then. I always play Crush The Castle 2 on Y8.com. I became addicted to it, the game was fun, I can throw various weapons to castles (my favorite is the poison potion thingy that melts everything in its wake). After I finished the game, I was looking for similar games, so I searched google on "Throwing Games, Physics, etc." and found Angry Birds. First impression was the characters are cute (notice their eyebrows??? :D). So I watched a video in you tube about it. I said "SHIT THEY'RE THROWING THE BIRDS!!!". God I was shocked. It was very funny, I enjoyed watching the game (I even forgot my work). The time I bought my Android handset, I immediately downloaded Angry Birds, played it, until 3 in the morning (Wahahhahahha :D I still have my job back then).
Hours of crushing objects, green colored pigs, and the birds faces (Notice that when the bird lands on anything). Each Angry Bird has its unique special moves which adds more fun to the game. Destroying structures with your wits is very fun. Whats more? You could have more fun with their free updates. I always wonder why the pigs are GREEN. You could download the game on Android here.
Saturday, 16 July 2011
Accelerometer Explained!
Accelerometers brings more usability to Android devices. Your phone can be a pedometer, it can detect the acceleration of your car, and even playing your phone like Wii. Technically, an accelerometer is a device that reports the acceleration exerted by the gravity of our planet on a specific axes. Most Android phones have a three-axis accelerometer making our handsets more interesting. The acceleration is expressed in meters per second. When an axis points away from the center of the Earth, the maximum acceleration is applied to it. If an axis points toward the center of the Earth, we get a negative maximum acceleration. For example, if we hold our phone in portrait mode (image you hold it very straight and you dont have a shaky hands), the accelerometer will report an acceleration of 9.8 m/s (this is because of the gravity of the earth. Free falling objects will have an acceleration of 9.8 m/s towards) while the rest of its axes are 0 m/s.
To better understand this explanation, lets create an application that displays the values of our accelerometer.
First thing to do is to register a listener. The name of the listener is SensorEventListener. It has 2 methods to implement, onSensorChanged() and onAccuracyChanged(). onSensorChanged() is called whenever a new accelerometer event happens. The onAccuracyChanged() is called when the accuracy of our sensor changes.
public class AccelerometerTest
extends Activity
implements SensorEventListener
{
@Override
public void onAccuracyChanged(Sensor sensor, int accuracy) {
}
@Override
public void onSensorChanged(SensorEvent event) {
}
}
To register our listener, we need to check whether an accelerometer is installed on our Android device. We will be using a SensorManager class, which we will use to check for an accelerometer and register the listener to it. Here's the code to do all does things (place this code in your onCreate() method):
SensorManager manager = (SensorManager)getSystemService(Context.SENSOR_SERVICE);
if(manager.getSensorList(Sensor.TYPE_ACCELEROMETER).size() == 0)
{
//no accelerometer installed
}
else
{
Sensor sensor = manager.getSensorList(Sensor.TYPE_ACCELEROMETER).get(0);
if(manager.registerListener(this, sensor, SensorManager.SENSOR_DELAY_GAME))
{
//cannot register sensor listener
}
}
Your accelerometer is now ready. We will then display the values of our device's accelerometer. The SensorEvent parameter of our onSensorChanged() method has a field member named values which is an array. SensorEvent.values[0] returns the value of X axis, SensorEvent.values[1] returns the value of Y axis, and SensorEvent.values[2] returns the value of Z axis. Try holding your phone in portrait and you will get a positive number in the Y axis. For the X axis, try holding your phone in landscape, its right side facing to the sky. Also try facing your phone's screen to the sky to get a positive number in the Z axis.
The full source code of this post is found here.
![]() |
| Android Phone with imaginary arrows representing the X and Y axis. Z axis' direction is in front of your phone. |
First thing to do is to register a listener. The name of the listener is SensorEventListener. It has 2 methods to implement, onSensorChanged() and onAccuracyChanged(). onSensorChanged() is called whenever a new accelerometer event happens. The onAccuracyChanged() is called when the accuracy of our sensor changes.
public class AccelerometerTest
extends Activity
implements SensorEventListener
{
@Override
public void onAccuracyChanged(Sensor sensor, int accuracy) {
}
@Override
public void onSensorChanged(SensorEvent event) {
}
}
To register our listener, we need to check whether an accelerometer is installed on our Android device. We will be using a SensorManager class, which we will use to check for an accelerometer and register the listener to it. Here's the code to do all does things (place this code in your onCreate() method):
SensorManager manager = (SensorManager)getSystemService(Context.SENSOR_SERVICE);
if(manager.getSensorList(Sensor.TYPE_ACCELEROMETER).size() == 0)
{
//no accelerometer installed
}
else
{
Sensor sensor = manager.getSensorList(Sensor.TYPE_ACCELEROMETER).get(0);
if(manager.registerListener(this, sensor, SensorManager.SENSOR_DELAY_GAME))
{
//cannot register sensor listener
}
}
Your accelerometer is now ready. We will then display the values of our device's accelerometer. The SensorEvent parameter of our onSensorChanged() method has a field member named values which is an array. SensorEvent.values[0] returns the value of X axis, SensorEvent.values[1] returns the value of Y axis, and SensorEvent.values[2] returns the value of Z axis. Try holding your phone in portrait and you will get a positive number in the Y axis. For the X axis, try holding your phone in landscape, its right side facing to the sky. Also try facing your phone's screen to the sky to get a positive number in the Z axis.
The full source code of this post is found here.
Thursday, 14 July 2011
Quick and Dirty Android Game Engine
Hi guys! This is my first post of my first blog! :D And it will be about making a quick and dirty game framework from scratch. It took me months to research about android and making games on it (There were very few tutorials for game development on android and there are fewer game engines available for it). You can download the file that we will be making here.
Let's start by creating a new android project. Supply the following information when prompted on creating a new android project:
- Project Name: Dirty Game
- Build Target: Android 3.1
- Application Name: Dirty Game
- Package Name: ind.crys.dirtyframework (or any package name of you choice)
- Create Activity: DirtyActivity
- Min SDK Version: 3
Eclipse will now display a ready to use activity naming DirtyActivity. Lets start by implementing an OnTouchListener and override the onTouch() method.
public class DirtyActivity
extends Activity
implements OnTouchListener
{
@Override
public void onCreate(Bundle savedInstanceState) {
super.onCreate(savedInstanceState);
setContentView(R.layout.main);
}
@Override
public boolean onTouch(View view, MotionEvent event)
{
}
}
Next stop, we will need to make a way to hold some important values every time the players of our game will touch the screen and use those values on our game loop for further processing. We will be making a class inside the dirty activity naming "TouchEvent" with fields naming x, y, and eventType all with a type of int. The x and y fields are the X and Y coordinates of the touch event. The eventType is the type of action made by the user in the screen. We will then add 3 integer constants in this class naming TOUCH_DOWN, TOUCH_MOVE, and TOUCH_UP with values 0, 1, 2 respectively. This constants will be used in assigning the value of the eventType field (we cant use the MotionEvent.ACTION_XX constants because there are many of them, some can be confused with the other. Keeping things simple :D).
class TouchEvent{
int x;
int y;
int eventType;
public static final int TOUCH_DOWN = 0;
public static final int TOUCH_MOVE = 1;
public static final int TOUCH_UP = 2;
/**
* @return the x
*/
public int getX() {
return x;
}
/**
* @param x the x to set
*/
public void setX(int x) {
this.x = x;
}
/**
* @return the y
*/
public int getY() {
return y;
}
/**
* @param y the y to set
*/
public void setY(int y) {
this.y = y;
}
/**
* @return the eventType
*/
public int getEventType() {
return eventType;
}
/**
* @param eventType the eventType to set
*/
public void setEventType(int eventType) {
this.eventType = eventType;
}
public TouchEvent() {
this.x = 0;
this.y = 0;
this.eventType = TOUCH_DOWN;
}
public TouchEvent(int x, int y, int eventType) {
this.x = x;
this.y = y;
this.eventType = eventType;
}
}
We will add a field in our DirtyActivity class naming "lastTouchEvent" with the type TouchEvent. We will use this to get the touch input values and use it in our game loop. There are many other techniques on getting touch events (one of which is called Pooling) but lets keep this game engine simple. Every time the players of our game does something to the screen (touching it, swiping it, drooling on it) we will save the values of that event on the lastTouchEvent variable. Add to fields in our DirtyActivity naming scaleX and scaleY with the type float. We use this later on (particular to drawing things in the screen). Copy the line of code below replacing the old onTouch() method that we had last:
public boolean onTouch(View view, MotionEvent event) {
lastTouchEvent = new TouchEvent();
switch(event.getAction())
{
case MotionEvent.ACTION_DOWN:
lastTouchEvent.setEventType(TouchEvent.TOUCH_DOWN);
break;
case MotionEvent.ACTION_MOVE:
lastTouchEvent.setEventType(TouchEvent.TOUCH_MOVE);
break;
case MotionEvent.ACTION_CANCEL:
case MotionEvent.ACTION_UP:
lastTouchEvent.setEventType(TouchEvent.TOUCH_UP);
break;
}
int newX = (int)(event.getX() * scaleX);
int newY = (int)(event.getY() * scaleY);
newX = (newX == 0) ? (int)event.getX() : newX;
newY = (newY == 0) ? (int)event.getY() : newY;
lastTouchEvent.setX(newX);
lastTouchEvent.setY(newY);
int newX = (int)(event.getX() * scaleX);
int newY = (int)(event.getY() * scaleY);
newX = (newX == 0) ? (int)event.getX() : newX;
newY = (newY == 0) ? (int)event.getY() : newY;
lastTouchEvent.setX(newX);
lastTouchEvent.setY(newY);
return true;
}
The code above simply creates a new TouchEvent object and assign it to the lastTouchEvent variable. As you may have noticed, we assigned the X and Y coordinates of our touch event multiplied by scaleX/scaleY variable. It is because we will be drawing on a fixed sized canvas and because not all handsets (or even tablets) have the same screen size. We will then scale our canvas with the size of the handset. The scaleX and scaleY fields are the ratio of the handset's screen size and our canvas' size. By the time users touches the screen, the X and Y coordinates of the touch event will be in the exact position as that of the canvas, not the handsets screen. Later on, we will assign the scaleX/scaleY fields.
Next thing to do is to create a way to draw things in the screen. We will be extending the SurfaceView class and use it for drawing graphics (By the way, SurfaceView is a special view that we can use to make it draw on another thread). We will name this class as FastRenderView and it will inherit SurfaceView and implements Runnable interface. Copy the code below:
class FastRenderView
extends SurfaceView
implements Runnable{
Thread renderThread;
SurfaceHolder holder;
volatile boolean isRunning = false;
public FastRenderView(Context context) {
super(context);
holder = this.getHolder();
}
//Methods
public void resume(){
isRunning = true;
renderThread = new Thread(this);
renderThread.start();
}
public void pause(){
isRunning = false;
while(true){
try{
renderThread.join();
break;
}
catch(InterruptedException e){
}
}
}
//Event
@Override
public void run() {
Rect dstRect = new Rect();
long startTime = System.nanoTime();
while(isRunning){
if(!holder.getSurface().isValid())
continue;
float deltaTime = (System.nanoTime() - startTime) / 1000000000.0f;
startTime = System.nanoTime();
DirtyActivity.this.update(deltaTime);
DirtyActivity.this.draw(deltaTime);
Canvas canvas = holder.lockCanvas();
canvas.getClipBounds(dstRect);
canvas.drawBitmap(DirtyActivity.this.frameBuffer, null, dstRect, null);
holder.unlockCanvasAndPost(canvas);
}
}
}
We will use FastRenderView class as our game loop. On the run() method of this class, you will find that it calls 2 methods of our DirtyActivity naming update() and draw() both of which accepts a float value representing the delta time. We will be using these methods to update game logic and to draw objects in our game. The FastRenderView class also uses a Bitmap that is found in our DirtyActivity naming frameBuffer. The frameBuffer field will be our fixed sized canvas. The 2 methods of our FastRenderView class, naming pause and resume, are used when our activity is paused or resumed (pretty self explanatory isn't it?).
Were almost there! Copy the code before and place it in our DirtyActivity class:
// Fields
FastRenderView view;
TouchEvent lastTouchEvent;
Bitmap frameBuffer;
Canvas graphics;
Paint centralPainter;
float scaleX;
float scaleY;
WakeLock wakeLock;
public static int PREFFERED_WIDTH = 320;
public static int PREFFERED_HEIGHT = 480;
//Methods
public void initialize(){
}
public void update(float deltaTime){
lastTouchEvent = null;
}
public void draw(float deltaTime){
}
/**
* @return the lastTouchEvent
*/
public TouchEvent getLastTouchEvent() {
return lastTouchEvent;
}
/**
* @return the graphics
*/
public Canvas getGraphics() {
return graphics;
}
/**
* @return the centralPainter
*/
public Paint getCentralPainter() {
return centralPainter;
}
The view field is the instance of our FastRenderView that we will use. The frameBuffer field is our fixed sized canvas that we used to draw in our FastRenderView. The graphics field is the instance of our Canvas class that we will use to draw things in our game loop. The centralPainter field is an instance of Paint class that we will use on our graphics field (I guess 1 Paint class is enough, but you can make more instances of Paint class if you want to :D). We then declared a field named wakeLock with a type of WakeLock. We will use this for the heck of not turning off the lights of our screens while our users play our games. The methods below are getters that will be used to on our game engine (We will use getLastTouchEvent() to get the touch event values and use it in our update() method to further process. getGraphics() and getCentralPainter() methods will be used in our draw() method). PREFFERED_WIDTH and PREFFERED_HEIGHT is the width and height of our frameBuffer. Our game will be drawn out of these dimensions, scaled to the screen of our player's handsets. So if your game idea needs it to be in portrait orientation, change their values. Or if your game needs to be with 1024X768 screen dimensions (Wow!), change their values. We can change this the way you want your canvas will be drawn.
Copy the code below to finalize everything.
@Override
public void onCreate(Bundle savedInstanceState) {
super.onCreate(savedInstanceState);
PowerManager powerManager = (PowerManager)getSystemService(Context.POWER_SERVICE);
wakeLock = powerManager.newWakeLock(PowerManager.FULL_WAKE_LOCK, "wakelock");
requestWindowFeature(Window.FEATURE_NO_TITLE);
getWindow().setFlags(WindowManager.LayoutParams.FLAG_FULLSCREEN, WindowManager.LayoutParams.FLAG_FULLSCREEN);
frameBuffer = Bitmap.createBitmap(PREFFERED_WIDTH, PREFFERED_HEIGHT, Config.RGB_565);
graphics = new Canvas(frameBuffer);
centralPainter = new Paint();
view = new FastRenderView(this);
view.setOnTouchListener(this);
scaleX = getWindowManager().getDefaultDisplay().getWidth() / PREFFERED_WIDTH;
scaleY = getWindowManager().getDefaultDisplay().getHeight() / PREFFERED_HEIGHT;
setContentView(view);
initialize();
}
@Override
protected void onPause() {
wakeLock.release();
view.pause();
super.onPause();
}
@Override
protected void onResume() {
wakeLock.acquire();
view.resume();
super.onResume();
}
Most things here are android specific. PowerManager provides us the instance of our wakeLock field. Then we made our game full screen by calling requestWindowFeature() method and getWindow().setFlags() method. We then initialize our frameBuffer, graphics, and centralPainter fields. We then initialize our view field set our activity's view with this FastRenderView instance.
Thats it! To finalize everything, create an activity that extends our DirtyActivity class and override initialize(), update(), and draw() methods. Set this activity as your main activity in your Manifest file. Also set the screen orientation as portrait (or landscape, as long as it corresponds to your PREFFERED_WIDTH/PREFFERED_HEIGHT. You should use fixed orientation to not to confuse the players of our game)
Lets try drawing something:
@Override
public void draw(float deltaTime) {
getGraphics().drawRGB(100, 149, 237);
super.draw(deltaTime);
}
This will color the screen to my favorite color "Cornflower blue" (this color is the default background color of games made in XNA, a game framework for PC and XBOX using the language C#). You can do more in drawing with canvas like drawing lines, shapes, images (perfect for games) and many more. Your imagination is the limit. You can get some info in the official android Canvas documentation.
Lets try processing input in our update() method:
@Override
public void update(float deltaTime) {
TouchEvent touchEvent = getLastTouchEvent();
if(touchEvent != null){
Log.i("Touch Event", touchEvent.toString());
}
super.update(deltaTime);
}
Everytime a touch event is made, LogCat will display the values of our TouchEvent. There's not much we can do in processing input because were limited with one TouchEvent and its not even supporting multi-touch functionality. Nevertheless, many games are still great with such limitations (Imagine all the games with point and click or point and drag input. Already imagined something?).
This game engine does not do much, unlike other free/commercial android game engines out there. But I believe that making a great game or app is not about what engine we use. Its all in our ideas as a developer.
Happy coding! :D
Subscribe to:
Posts (Atom)